We may earn revenue from the products available on this page and participate in affiliate programs. Learn more ›
As a teenager, I talked a big game about what my Charger would be. Long before I yanked it from the field I found it in, I spoke about how it’d have the best drivetrain and suspension. In my naive and bold ramblings, I distinctly remember talking about how it would handle like a modern car but still have all the grunt and glory of days passed. I never put much thought into how hard it would be to pull something like that off.

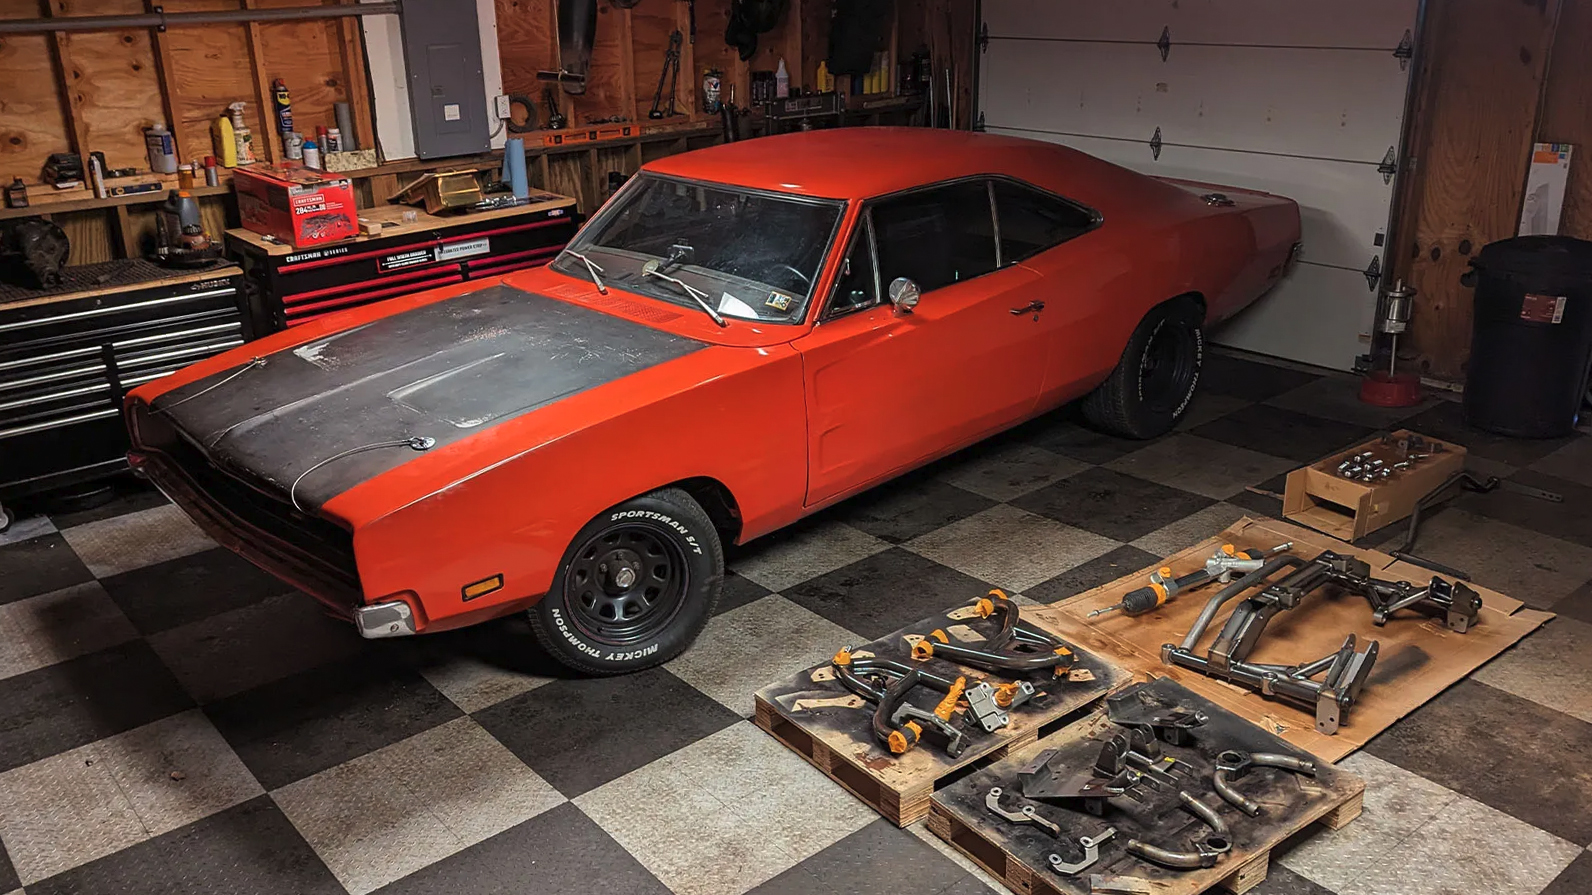
New suspension installed, new ride height set. Hank O’Hop
Once I actually started working on the Charger eight years ago, reality set in. My dream car would take much more money and labor than a younger me could appreciate. Over nearly a decade and countless hours of wrenching, the Charger and I forged each other into more mature versions of one another with a more realistic list of expectations. Then, this opportunity to install and review Heidts’ front and rear suspension systems in my car presented itself. All I have to do is the work. And if this car’s taught me anything, It’s how to work my ass off.
It’s been almost two months since I installed the 4-link conversion at the rear. It’s been a long, hard road. Finally, the car is officially back in commission. I am happy to say that the Heidts Pro-G IFS installation is complete. Before we move on to the final review, let’s go through the process from start to finish to give anyone considering this upgrade a look at what it takes.
For some of you who might be dreaming about this kind of project like I once did, maybe this can be your reality check, or, your inspiration.
The Virtues and Banes of the Mopar Front Suspension
Heidts’ Pro-G IFS (independent front suspension) is a radical upgrade that strips the entire front suspension out of the car and converts it to a totally new setup. Most notably, though, it replaces factory torsion bars with coilovers.
Torsion bars are long rod-like springs that have keyed ends. On these old Mopars, one end is locked firmly into the chassis, while the other is mounted to the lower control arm. As the control arm articulates, it twists that torsion bar. The torsion bar’s resistance to that twist is what supports the weight of the vehicle.

Hank O’Hop
The use of torsion bars alone is something that makes old-school Mopar muscle cars unique. However, the fact that they’re adjustable from the factory is where the real cool points are awarded. A simple adjuster screw on the lower control arms allows you to raise and lower the front end on command, giving these cars a major edge. On top of that, the old torsion bars are stupid-durable and seem to last forever.
All that to say, abandoning them feels wrong. However, torsion bars are only a single component of the suspension. Chrysler engineers, while they got a lot of things right, didn’t exactly dial in these front ends for optimal performance. The engine is way far forward, making these cars really nose-heavy. The geometry of the suspension is also a bit out of whack, and the stamped control arms are prone to deflection. Classic Mopars aren’t as undrivable as a lot of people rush to say they are, but there is plenty of room for improvement.

Hank O’Hop
Heidts’ Pro-G IFS for the 1968-1970 Dodge Charger and 1970-1974 E-Body is a bolt-in system that does quite a bit to up the handling and ride quality of the platforms. It converts to rack and pinion power steering, swaps to new upper and lower control arms with improved geometry, shifts the engine rearward for improved balance, and ties everything neatly together in a new, custom tubular K-member. Along the way, it converts from the factory torsion bars to fully adjustable coilovers, which softens the blow of losing the staple of Mopars muscle cars.
The appeal of a kit like this is that it deals with a whole bunch of problems at once. It does not mean the factory system can’t be altered to work a lot better, though. I had the car set up to drive pretty well with an upgraded steering box and extended steering arms. There are some incredibly intelligent people out there, like Chris Birdsong, who can science the factory components out to make them work even better. A kit like this just hits all the major concerns, and then some, saving you the homework. It does come at a hefty cost, though, with a starting price of $6,721.00.
Teardown and Prep for Heidts Pro-G IFS
There’s a ton of work to do when installing this kit. It starts with stripping virtually everything mechanical out of the front end—that’s the easiest part of the project. When these cars were made, their designers understood the importance of serviceability. Tearing them down to almost nothing takes time, but it really is pretty simple wrench work.
I had the car totally barren and ready for the conversion in about a day. The trickiest part of taking these cars apart can be the sticky torsion bars, but even that gave me little trouble. At least on the physical end. Even if there are promises of good things to come, I’ve grown to be a bit of a purist, and stripping the Charger of the iconic torsion bars left me feeling the kind of dirty I can never wash off.

Hank O’Hop
If you’re doing this to your car, now is also the time to consider installing chassis reinforcement components. As Chris Birdsong pointed out to me when I took this on, these cars are, again, built to work with torsion bars that place the load way back on a crossmember located on the floor pan. The front clip isn’t intended to support the full load of the suspension that coilovers put on it. Heidts claims to have engineered this kit to offset the issue, and components like the beefy shock towers certainly seem to back that. However, additional support is only a good thing.
Birdsong basically wrote the book on beefing up B-bodies of this era. It is wise to take his advice of adding stronger core support and welding in additional shock tower supports on the car. I want to review this kit as is, but I fully intend to add them and more chassis stiffening pieces at a later date. But, if I were to install them ahead of time, I would take this stage a step further and remove the fenders so I can prep the metal to weld in the recommended components.
Installing Heidts Pro-G IFS Bones
The next step is to mount the Heidts Pro-G IFs K-member and put the new shock towers in place. The K-member is largely straightforward, using the original four mounting bolt holes to mount up. There are two additional mounting holes found on brackets that slip over the frame rails at the rear of the K-member. For these, you need to drill a couple of holes for more bolts to run through.
The new shock towers are as simple to install as the K-member. The Heidts Pro-G IFS kit uses custom shock towers made from thick steel to mount the new coilovers. Luckily, the upper portion of the new shock tower does reuse the factory upper shock mount. The lower portion simply slips over the subframe. From there you drill a couple of holes to secure it in place.


The upper control arms also make use of the original mounting points. These are adjustable and need assembly prior to slapping them on, but are simple to install. The lower control arms just pop into the new mounting locations on the Heidts Pro-G IFS K-member. The coilovers bolt to them and the new shock towers. From here, it’s just a nuts and bolts operation. The most time-consuming part is getting the camber set up even from side to side to aid future adjustments. An electronic angle finder is helpful for this.
This is the part where I got hung up. I was not aware that my factory brakes wouldn’t work with the new spindles. I had to put the project on hold and sort that out. However, you can order compatible brake packages straight from Heidts if you’re buying one of these kits. And Wilwood conversion kits make really quick work of this. Converting over to the appropriate disc brakes only adds a couple of hours to the process, and of course that’s a huge performance upgrade for the vehicle in of itself.
Engine Modifications and Preparation
Setting the steering system up for the Heidts Pro-G IFS is where the difficulty level of this project spikes. But before you can get into that, you want to make sure the engine is ready for its multiple trips to and from the engine bay.
Among the many things this kit does to improve the mighty Mopar is converting from a center sump to a rear sump. Placing the sump at the rear of the engine means the pickup won’t starve of oil under heavy acceleration. That is a problem Dodge and Plymouth hotrodders have been contending with since the golden age of muscle cars.
The challenge of moving to a rear sump oil pan on this generation Mopar is the factory drag link. Because we’re moving to rack and pinion power steering, this is no longer an issue. We can use a regular rear sump oil pan for the 440. The instructions recommend using Milodon part number 30891, which requires pickup part number 18457 and dipstick part number 22040.


The oil pan simply bolts in place, but you will need to modify the factory windage tray. The new pickup runs from the center of the engine to the rear, using a bolt on the number four main to stay secure. If you’re using the stock-style windage tray, you need to cut a hole for this support to pass through. Don’t worry. It’s fine. My engine’s seen an excess of 5,000 rpm since wrapping this up on multiple occasions, and everything’s worked out fine. You’ll also need to plug up the original dipstick port because it will no longer be used. 440 Source offers plugs specifically for this, and a dab of RTV offers peace of mind.
Other than the oil pan, the only driveline modification you’ll need to make is to the transmission mount. Because the engine shifts back a bit, you need to slot the mounts an additional 3/8 inches. This is to accommodate the shift and still be able to use the factory crossmember. Once that’s done, you’re good to bolt the motor mounts up and start mocking things up to sort out the steering.
Sorting out the Steering
Setting the steering up is the hardest part of this job. There’s no guidance currently available on what headers work best with the Heidts Pro-G IFS. Nor is there anything detailing how to route the steering shaft. Builders have to figure this out for themselves. It’s not impossible, but it takes a bit of ingenuity.
What makes this so difficult is that the new steering box is located lower and more toward the center. The input shaft sits really close to the bottom of the engine. The steering shaft will interfere with the many off-the-shelf aftermarket headers. I had to cut and reroute the number three runner on my headers to accommodate what I found to be the best path for the steering shaft to follow on my setup.


Even after modifying my headers, I needed to use multiple steering joints and support bearings on the steering shaft to avoid sharp angles and keep things stable. That meant the engine needed to come out of the car a few times to line everything up. It was as much of a test of my patience as it was of my skill. I can’t say for certain, but factory manifolds or engine swap headers, as pointed out by commenters, will likely pose much less of an issue for this step.
As for the steering rack itself, it does bolt right in place. The only “tricky” parts are finding the right adapter fittings to plumb up the original pump and centering it prior to installation The reason I’m even bringing it up is because the instructions mention featuring a 21.5-inch or a 24.5-inch steering rack, with the 24.5-inch having spacers under the boot to limit the steering radius. It’s hard to get a measurement with the boot on, and I took mine off to take a closer look. My kit included the 21.5-inch rack without the spacers. Others with this kit may want to check for themselves, but this heads-up may ultimately save them a bit of work.
Finding Final Settings of Heidts’ Pro-G IFS
There’s a lot of taking things apart and putting them back together involved with the later stages of this project. How long it’ll take depends on the specifics of your application. You can take solace in knowing that, once the headers and steering rack are in, you’re pretty much out of the woods.
My biggest concern afterward was if the 4-speed hump would need to be cut because of how the engine shifts rearward. I can confirm that is not the case. Even with the engine moving back, there’s still plenty of room between the shifter and the floor. I also didn’t need to cut the driveshaft on my car, but I won’t say that’s the case for others. Anyone installing will definitely want to measure to verify the proper driveshaft length once the engine and transmission are installed. I had mine cut a little shorter than it needed to be earlier on this year and landed within acceptable spec here because of that.

Hank O’Hop
Once the vehicle’s back on its suspension, drivability is just a matter of getting a proper alignment and setting the ride height. On the factory Mopar setup, either of these was very easy, to begin with. To be completely fair, it’s a touch more difficult with this kit because you need to adjust coilover collars for ride height as opposed to simply fastening the torsion bars adjuster screw. Setting toe now entails breaking the tie rod free and screwing it in or out rather than just using an adjuster sleeve. Don’t worry, the process isn’t so hard that any of this qualifies as a real complaint. They’re just a couple of changes builders need to know about.
Dial in and Road Test
Finalizing this project gave me the mental reset I desperately needed. It’s hard to quantify the toll a nearly-decade-long project like this can have on a person. Especially where sentimental value is a major factor, and the car was so far gone to begin with. This project’s pushed every skill and bit of patience I’ve developed over the years to the limit. It’s been tough, but I’m better for it.
It’s not an impossible task. These kits certainly make it easier than ever to add modern suspension to a classic car. It’s no simple bolt-in process though. On the same scale of 1-10 I used to rank the difficulty of the rear 4-link swap, I’d call this an equal 7. The header and steering situation is the hardest part, and there’s just a huge scope of different things you need to touch for this job. You still aren’t building a car from scratch, though, and most of the guesswork is taken care of by Heidts. As I’ve demonstrated, it can, in fact, be done by a non-professional in a home garage.

When this Charger finally hit the road with its entirely new suspension, I became a new man. I’m not so hasty to rush into giving a driving review of it all before I spend some time dialing it in. But even at first impressions, the results are impressive. Still, I’ve got to put some time into ironing it all out until I cover the formal road test.
That said, now’s as good time as any to say that the coming road test will be just that. Like many of you, my first thought was to take the car to formal testing grounds to see how it performs throughout the various stages. However, when I was quoted $800 per day, I had to ditch the idea as I’d have to have invested $2,400 into that alone. Still, I have examples of factory and modified Chargers to compare it all against for an insightful and fair final review of these kits. Stay tuned.